
The following is my experiences with removing, rebuilding, and re-installing the rear differential in my 1968 Chevrolet Corvette 327.
The ’68 Corvette was purchased as a ‘fixer upper’. The car came with a 350-crate engine installed. But I did get the original block, heads, crank, and miscellaneous components. Donna and I drove the car ‘as is’ for a few years. (I was fixing ‘other’ things) I initiated the engine rebuild in the spring of 2021 and finished the engine in August 2021.
The transmission was rebuilt in 2023. Then, we replaced the trailing arms in 2024….see David Steidinger article on this project.
Honestly, after vacuuming out the lubricant and viewing what we could through the fill hole, we convinced ourselves that the rear didn’t need to be done. OOPS! The car continued to have an intermittent rear-end ‘clunk’ I was not thrilled with! I tried replacing the axle lubricant with special GM posi lubricant, but that did not resolve the problem. So, the rear differential project was initiated.
The first step was the ‘research’ phase. David provided a lot of valuable service information from his collection of shop manuals. It was determined that the differential could be removed without removing the rear cover. The rear cover provides mounting points for ‘other’ suspension components. So, removing the leaf spring, the struts, and the shocks could be avoided. And leaving the rear cover in place also avoids the potential breakage of one of threaded tabs on the bottom of the cover if/when a rusty spring clamp bolt refuses to come loose.
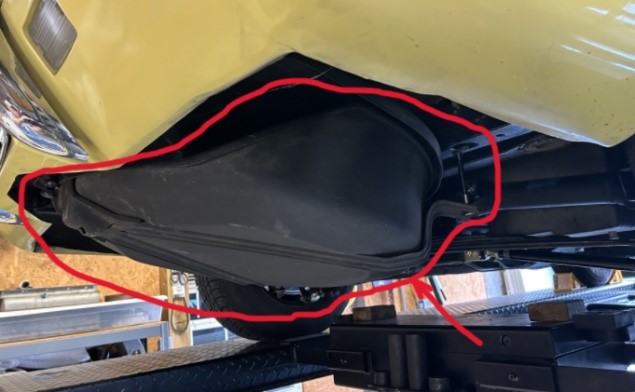
Time to ‘dig in’ to the project. The first step is to remove the spare tire and it’s carrier. The carrier consists of an upper shell and a lower shell. Six bolts hold the assembly and removal is fairly easy. Except, the spare tire isn’t very ‘lite’!!
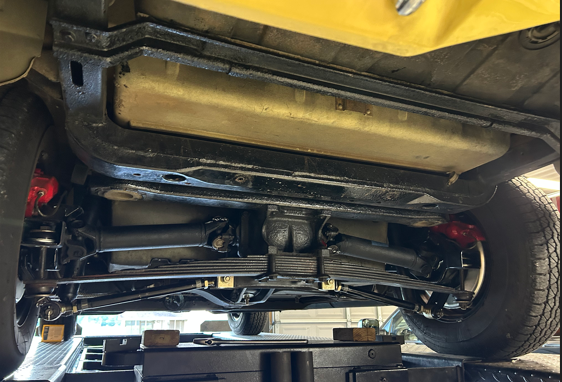
Now, the rear end area is exposed.
The next step is to remove the driveline. The driveline should be ‘marked’ at each end to maintain the same alignment upon re-installation.
I marked ‘F’ for front on the transmission end. And, marked a white line from the driveshaft yoke to the tranny yoke. The process was repeated on the Differential end. Now, the driveline can be re-installed as removed. Therefore, balance issues should not arise. This process is repeated two more times, once for each half-shaft. Also, the lube is removed from the Diff at this point. Thanks David for the ‘vacuum tool’ to draw it out!

Now, the strut bracket is un-bolted from the bottom of the rear cover. Six bolts total.
Next, the leaf spring retainer bolts are loosened to gain access to the bottom cover bolts.

Next, we will remove the snubber bushing on the front of the differential and the snubber bushing bracket:
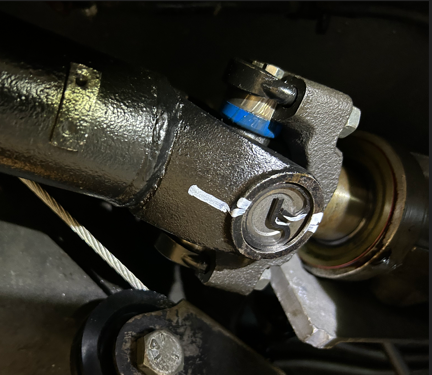
Loosen the bolts on the Snubber bushing. Then, loosen the bolts for the bracket. Remove the front bolt and the bracket will rotate downward to allow removal the snubber bushing. Caution: removal of the rear bolt is a PAIN in the posterior!! Note: U can see the markings on the rear of the driveshaft in this photo. But, also note, the driveshaft would have already been removed before removing the snubber and bracket.
Finally, remove all eight cover bolts. We used a six-point box-end wrench to access and loosen all of the bolts without rounding off any of bolt heads. The bottom two bolts will remain captured between the leaf spring and the back cover. Now, the real fun part begins!!! With a couple of cover bolts left in place, but loosened, we separated the differential carrier from the rear cover at the gasket interface by hitting the nose of the carrier case from the side with a long, heavy, hickory wood handle.
The differential is very closely contained between the differential cover in the back, the two storage compartments above, and the chassis snubber mounting bracket. Getting the differential carrier out was a very cumbersome and heavy ordeal!! We determined that the half-shaft yokes had to be positioned just so at about 45degrees back angle. Then, you had to rotate the rear end at the same time as down to create space for the ring gear to be removed. Finally, after much consternation(might translate to some swearing), David and I got the rearend out and on the floor.
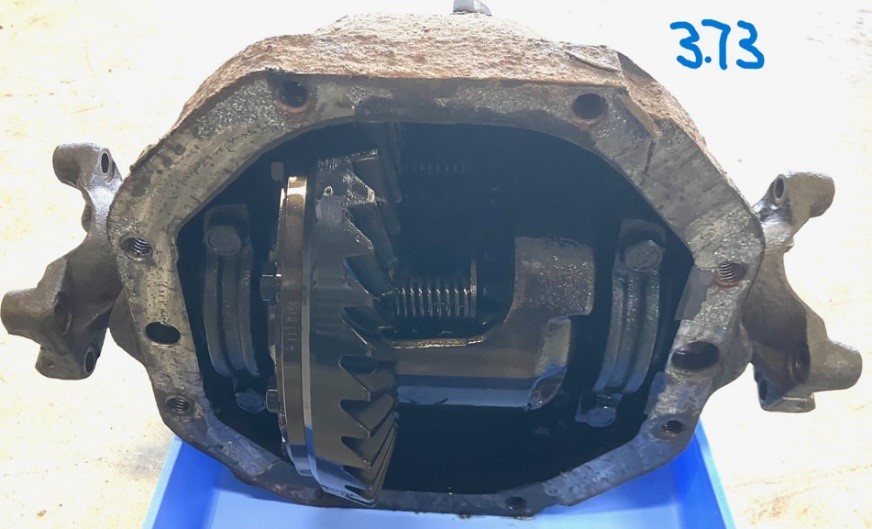
The gears appeared to be in good shape. The clutches appeared to be pretty worn and ‘galled’. The differential was rebuilt. All gears were in good shape and re-used. All seals, bushings and bearing were replaced. And, obviously, all new ‘clutches’ were installed.
Installation went a little easier due to the knowledge and experience gained during removal. (Hope David Agrees). Plus, I discovered that twisting the assembly slightly helped ease the protruding ring gear back up and into the rear cover.
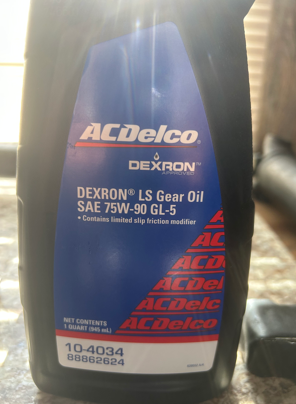
The ‘new’ rear differential needed filled with new special posi lube. Hold onto your hats when U buy this stuff!!! 😊 $88.63 for two quarts!
Now, the differential requires a ‘break-in’ process as follows:
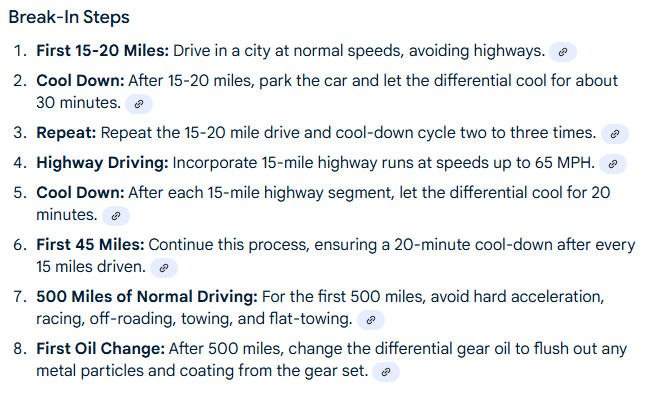
As this is written, the break in process is just about complete. We are currently on step 7…500 miles of normal driving. In my case, the bearings and gears were already broken in, but I still followed the procedure in order to work the new posi lubricant into the clutch plates and have the plates wear-in without overheating or galling. So far, the results are ‘looking’ good!
Once again, THANKS to David Steidinger for all his technical information and spending a lot of time at my house supplying an extra set of hands!! I found out that he’ll work for home-grown garden tomatoes.
Steve Arnold
stephenmarkarnold@gmail.com