
If your C6 or C7 has dry sump lubrication system, the battery is mounted in the back of the car – which is a great place for it. The battery is not exposed to engine heat, stays way cleaner so it doesn’t self-discharge as readily, and it provides a little extra weight at the back for much needed traction. Plus, it’s easy to access if you need to trickle charge the battery or disconnect/reconnect the battery terminals.
All is good until you need to remove/replace the battery, which I do every year as my car stays in a storage unit over the winter, with no electricity to keep the battery trickle charged.
In the C6, after you disconnect the battery cables it is a challenge to get the battery in or out of the access opening provided in the rear compartment. I’ve seen at least one YouTube video where two or three guys struggle to get the battery out past the cables and through the seemingly slightly too small frame around the battery door. I did this once myself with skinned knuckles and lots of cursing – only to find out my battery was fine, but good ol’ On Star drained the battery when it couldn’t reach my car while in the garage, by the way. Solved by pulling out the On Star fuse!
THERE’S AN EASIER WAY TO GET THE BATTERY OUT!
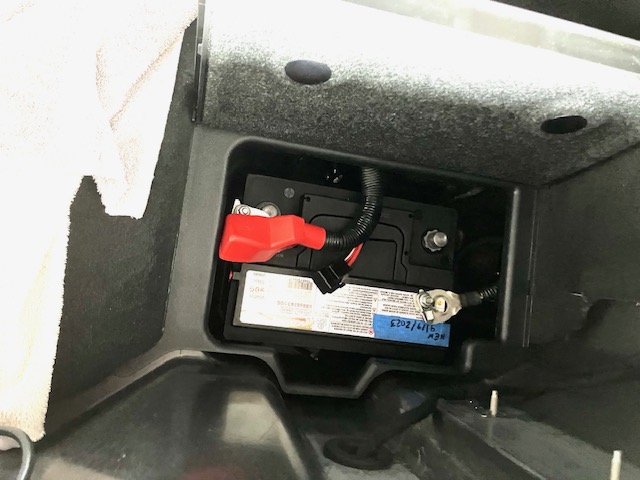
The positive battery cable is thick and crosses over the top of the battery. It’s in the way. So what can you do to get it out of the way?
First, a couple of precautions. Make sure everything is ‘Off’ in the car. Place the remote fob well away from the car, such as 50 ft and better yet, put the fob in a closed metal container. This prevents communication between fob and car and minimizes the possibility of damaging a Body Control Module or other fussy, expensive, and sometimes really hard to get electronic stuff in your car.
Disconnect the negative terminal by loosening the 8 mm nut on the cable clamp and wiggle the terminal off the battery post. Note: by removing the negative terminal first, you minimize/eliminate the possibility of striking a very large and frightening short circuit arc off of the positive terminal
Remove the two 8 mm nuts on the battery hold-down – spin them off carefully to avoid losing them down in the battery compartment. Place all the removed parts in a box or plastic bag and temporarily store them outside of the car so they don’t get lost later, when you pull up the rear compartment floor carpet.
Disconnect the positive terminal the same way – loosen the 8 mm nut and wiggle the terminal up and off the battery post.
Wiggle the vent elbow out from the side of negative end of the battery. Potentially explosive hydrogen gas is generated when the battery is charging. This vent routes the hydrogen gas outside of the car where it can more safely dissipate.
Remove the carpeted rear panel that covers the rear bulkhead. All the four end fasteners are exposed and finger-friendly. The two push-pin fasteners near the latch might need a gently pry with a flat blade screwdriver to pull out the center pin. Unplug the two rear courtesy light connectors, one at each end of the rear carpeted panel. Set the rear panel down in a clean, safe area.
Carefully pull out the right rear carpeted wheel well panel from the top at the hatch opening.
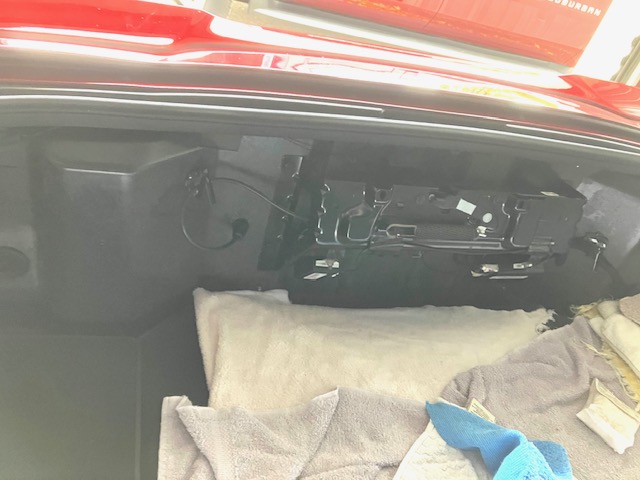
This allows you to lift up the back corner of the carpeted floor panel and with it, the battery door and door frame.
Now you can lift the positive battery cable out of the way enough to lift the battery out through the battery door opening. This makes a BIG difference in getting the battery out (or back in).
OEM batteries often do not have a lift handle, but replacement batteries often do. The lift handle is a huge help, but for safety, try to support the battery from the bottom with your free hand to prevent damage just in case the handle breaks!
Removing the rear trim panel and partially pulling out the wheel well carpet makes battery replacement so much easier! And it’s just a few minutes’ work that saves you many more minutes, skinned hands, and if you’re like me, lots of curse words.
Now the battery goes back to my warm garage and maintenance charging with a Battery Tender® until next spring.
Reinstall/reassembly is just the reverse of the above suggestions. No special tricks. Make sure you have your fob isolated again and attach the negative cable last! And don’t forget to reinstall the vent fitting.
The C7 battery removal is easier, because it doesn’t have that smallish door and opening for the battery. You can pull up the right rear compartment carpet floor panel without removing any trim panels – be gentle though to avoid creasing the panel. There is a rigid foam cover over the battery that lifts right out and the battery access is much more open.
The step-by-step process is detailed below with some illustrations.
Your battery is in this rear compartment if you have a C6 or C7 with dry-sump lubrication system (Grand Sport, Z06, or ZR1).
In the C6, the stiff positive cable makes it very difficult to get the battery in or out unless you perform a few easy, extra steps.
Remove the rear bulkhead carpeted panel.
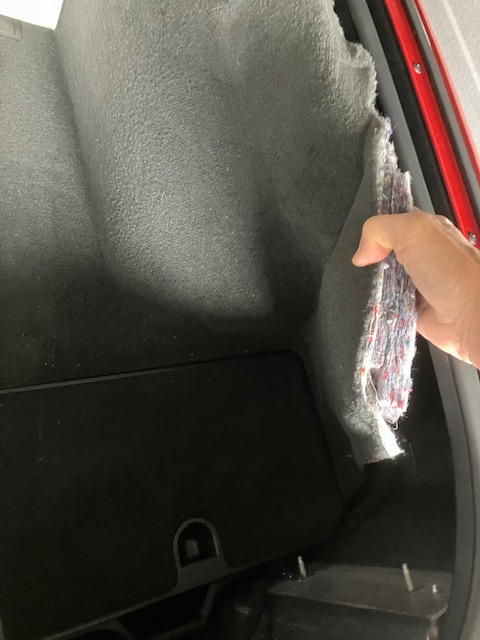
Carefully pull out the carpet over the right rear wheel well. There are no fasteners – it just tucks up under the edge of the rear hatch opening. Freeing this carpet and padding allows you to lift up the battery door frame, surrounding rear compartment floor carpet, and positive battery cable just a few inches.
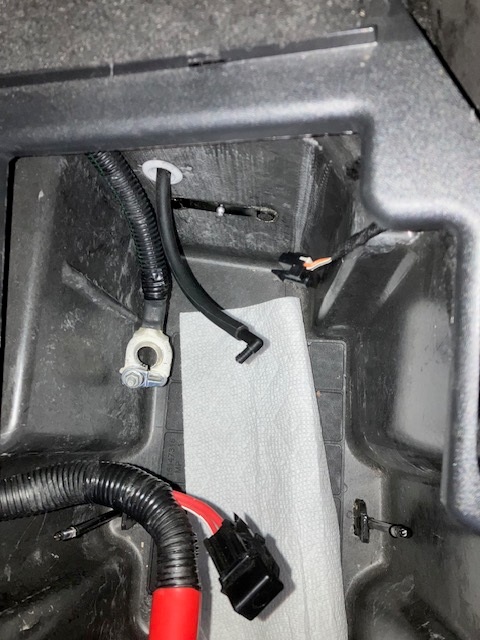
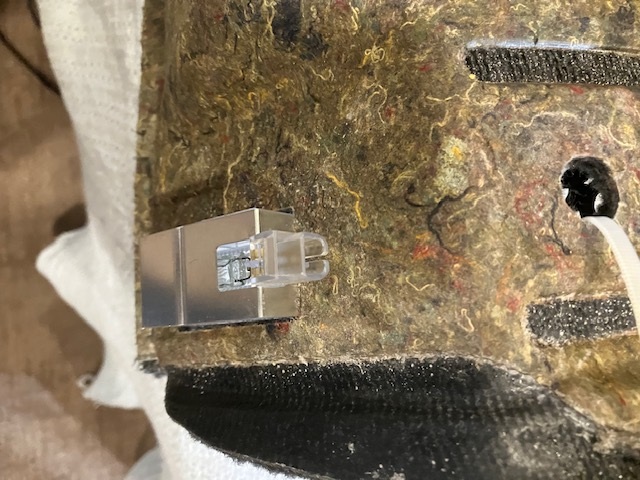
Here’s the battery compartment with the battery removed. The right-angle fitting at the end of the hose plugs into the battery vent at the top edge of the negative end of the battery
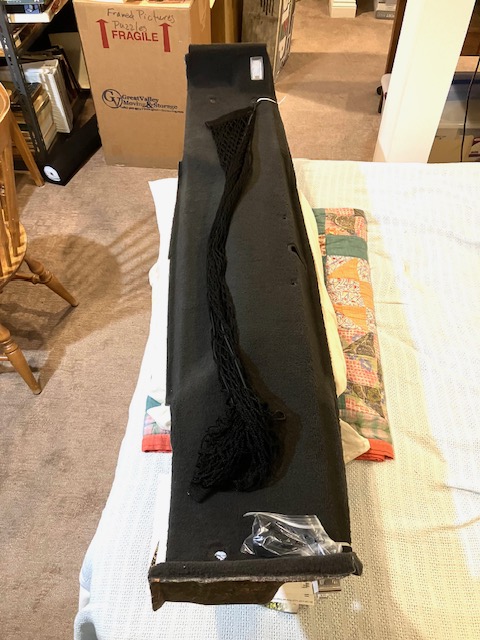
This is the removed rear bulkhead carpeted panel.
The C6 has a courtesy light at each end of the rear panel. The wiring harness needs to unclip and disconnect at each end of the panel.